top of page

Kimberly Gora

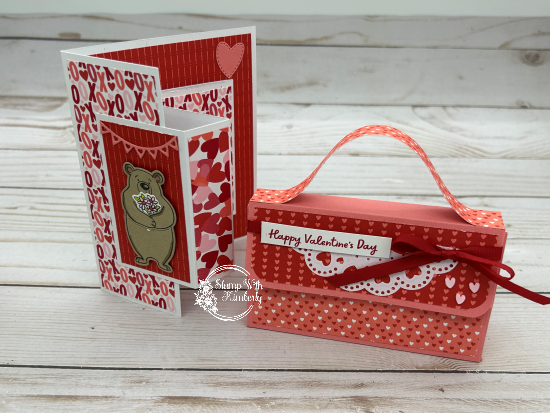
Main Box: 8-1/2" X 6-1/2" Score short side at 1", 5-1/2" Score long side at 3-1/4" and 4-1/4" DSP 4" X 3/4" (need 2) 4"1/4" x 4" (need 1)


Tom Bow Box Score short side at 1" and 2-1/4" Score long side at 3" and 4" DSP 1" x 1-3/4" (front) need 1 2-3/4" x 3/4" (side) need 1


Glue Box 6" x 5" Score Short side at 1" and 4" Score long side at 3" and 4" DSP 2-3/4" X 1-3/4" Front need 1 2-3/4" x 3/4" need 1


Make sure you use Tear Tape, or some other strong adhesive, so your boxes stay together.

8 views0 comments

Turn your favorite die into a stamp!

Are you looking for a way to turn your dies into stamps? This is how I did it...

First you need to get a piece of thin foam, from your local Michaels, or JoAnn's. The kind that has the adhesive backing works best.

Take your favorite die, and run it thru your Diecut machine, on top of the foam. Peel off the adhesive covering, and put the die cut image on your clear block. BOOM.... You now have a stamp to use as you wish.

I hope you put this to the test with a few of your favorite dies.


1. Cut Balmy Blue 8-1/2" x 5-1/2", and fold in half at 4-1/4".

2. Emboss So Saffron with Embossing folder. Wrap ribbon around yellow, and attach layer to card front.

3. Die cut White oval, and DSP oval. Glue DSP oval to card front.

Stamp Bunny on white oval, and color with blends. Ink edges with Blending Brush with Balmy Blue ink. Stamp carrot, and eggs, and color and fussy cut out.

4. Die cut label, and stamp sentiment. Attach to card with dimentionls.

5. Glue eggs, carrot and gems to card front.

6. Cut a piece of Basic White 5-1/4" x 4" for inside sentiment, and glue inside card.


9 views0 comments
  • Facebook
  • Pinterest
  • Instagram
bottom of page