top of page
Stampin' Up! Demonstrator

Kimberly Gora

Today I have the card that goes on and on!

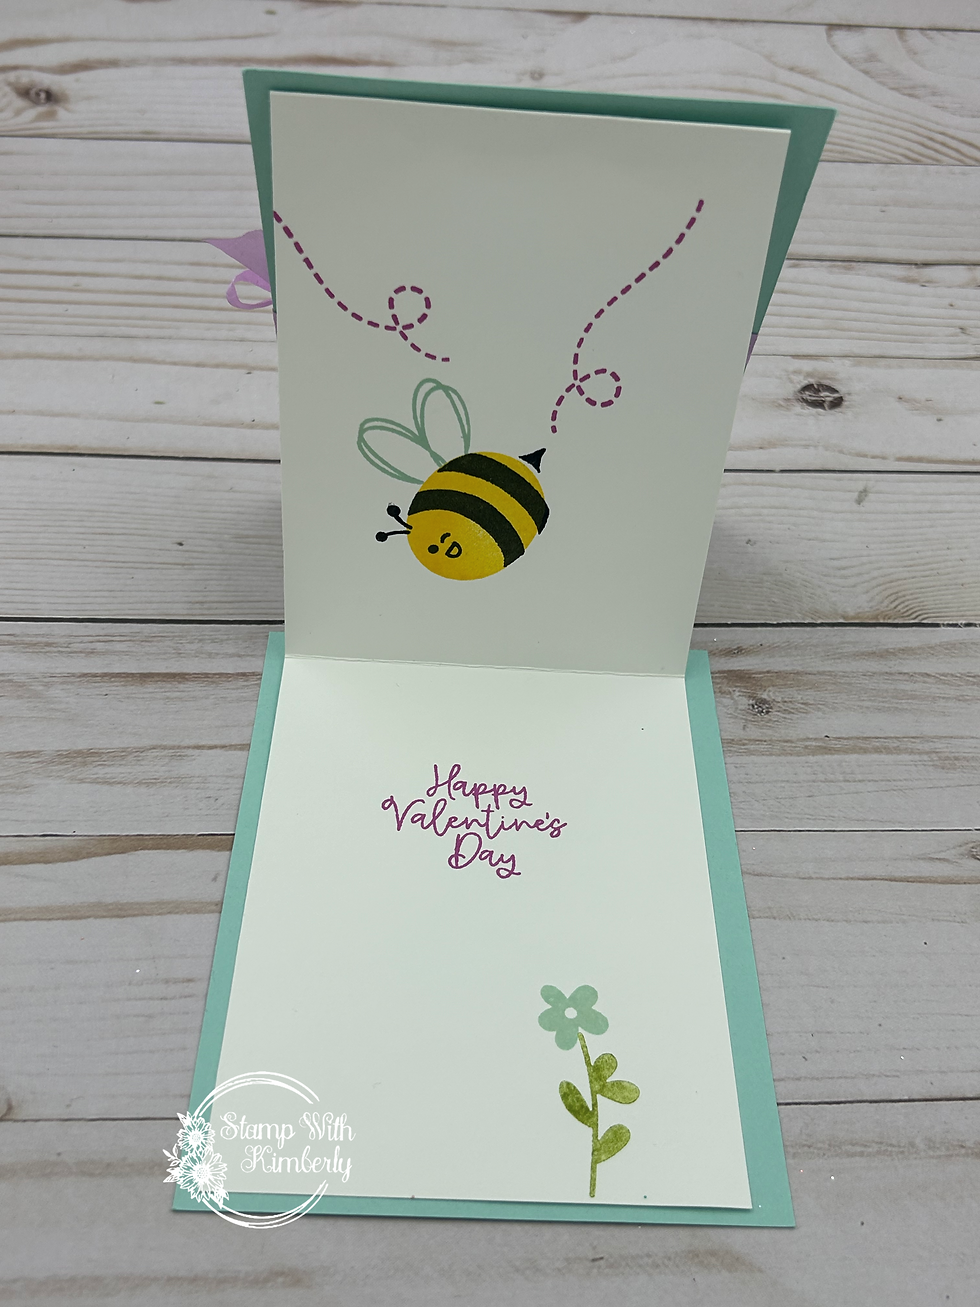
I love how the Bee looks like he is about to dive bomb that flower.

This is a good card design if you have a lot to write inside, or if you have a group of people that need to sign the card. You will have plenty of space!

Give it a try!


Today I made this pop-up card using the new Cute as Can Bee Designer paper. I paired it with the retired Bee My Valentine Bundle, but you can get the new Meant to Bee Bundle with coordinating Dies! It has awesome stand alone hexagon shapes, and so much more.

This fun pop-up card is sure to make someone's day, with a happy little bee smiling up at them.


1. Cardstock- 8-1/2" x 5-1/2"


Score at 4-1/4"


2. C/S 4" x 1-1/2" score at 1", 2", 3"


3. C/S 2-1/4" x 3/4". Score at 1-1/4"


DSP:


5-1/4" X 4"


White:


5-1/4" x 4"


-Fold card base at score line.


-Glue DSP on front of card. (Only glue around edges to adhere)


With a circle die attach to front of card with washi tape, run top part ONLY thru the die-cut machine. (do not throw away cut out circle.)


-Attach white piece inside card. You can stamp on it 1st, but stamp low, so that the moving mechanism doesn't interfere. (like mine did) Oops!


- Fold 4" x 1-1/2" piece on score lines. Place glue only on 1st square, Attach to center on card, with flap coming toward you.


-Now place glue on last square, (careful to only apply closest to edge) and attach to inside card front when closed.


(You now have a square pop up in your card when open.)


- Take the 2-1/4" x 3/4" piece and put glue on the long end, and attach to top of pop up square.


- Take the circle that you cut out from the front (cardstock only) and attach to flap inside card, by placing glue on the flap.


- Cut out a matching circle in white, and apply to card circle.


- Decorate as desired.


1. White- 8-1/2" x 5-1/2"

2. DSP- 5-1/4" x 4"

3. Mark 1-1/8" down from top right with a pencil.

Mark 2-1/8" down from top left.

Put in cutter, and connect the lines, and cut.

4. With remaining piece mark top left at 7/8", and right side at 3".

Connect the marks in cutter, and cut.

You now have 3 pieces. You can flip one of the pieces over, so get the design.

Glue to card front.

5. Stamp bee/wings and assemble.

Die-cut circle, and stamp sentiment and hearts. Attach Bee.

Put on card with Dimentionals.


Note: If you want to do all your marks before cutting. Mark right side at 1-1/8", 4-1/8"Mark left side at 2-1/8", 3" Cut across card diagonally to connect the dots.

Add Gems.


  • Facebook
  • Pinterest
  • Instagram

© 2020 by Stampin with Kimberly   |   Proudly created with Wix.com

bottom of page