top of page
Stampin' Up! Demonstrator

Kimberly Gora

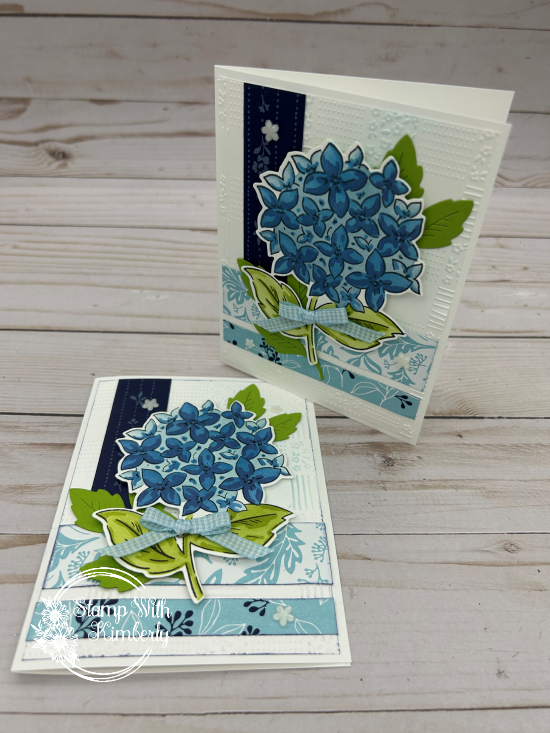
On the card today, I used two of the coordinating patterns of DSP from the Products of the Month. I then added a beautiful focal image on the front, using sprigs from Nature's Symphony Dies, and Pretty Florals Dies. The little bit of twine peeking out, gives it a little interest, and the cute Hues of Blue embellishments are just the right touch. I used a die-cut to set the sentiment. (I love the elegant font on this one! ) Elegant, easy, an very duplicatabale! Give it a try!


1. Card Base- White- 4-1/4" x 11"


Score at 5-1/2"


2. DSP Strips- 1" x 5-1/2" Ink edges


Dark Blue DSP- 2" X 5-1/2" ink edges


3. Die cut arch in white. Ink sentiment in Blue. Add to card with dimentionals.


4. Die-cut leaves in Night of Navy. Add to card front.


5. Die-cut flowers in white. Ink blend, and add Night of Navy layer.


6. Add twine to card front.


7. Add flower on top of twine with dimentionals.


Tuck in small flowers


8. Add gems


 I used the December and January Products of the Month. The mixture of December True Blue Floral Designer Paper coordinates perfectly with the January Product of the Month sentiment, in Fabulous Sayings. Finishing with pretty floral accents popped up on the front in crisp white, and navy blue for a classic elegant look. I created this projects along with 2 more that coordinate in my Motivation Monday on FB.


1. White- 8-1/2" x 5-1/2". Score at 4-1/4"


2. Ink all pieces below around edges.


Balmy Blue 3/4" x 5-1/4" Stamp sentiment


DSP- dark blue- 2" x 5-1/4"


DSP- top piece- 1" x 5-1/4"


DSP Banner- 3-3/4" x 1-1/4"


3. Add twine.


4. Die-cut leaves in Green- Glue to card front.


5. Die-cut flower in white, and ink blend edges in blue. Add Night of Navy layer on flower. Add to card with Dimentionals.


6. Add gems


This card is full of layers! For this card I used one of my most favorite products, MASKS! I LOVE using them, because it makes your coloring look perfect every time! This flower makes such a bold statement, that I didn't even need to put a sentiment on this one. The backgound embossing folder adds texture, and the ink blending adds even more color. The beautiful DSP coordinates, and the bow just tops it off! The Thankful Garden set is on Last Chance, so supplies are limited. Get yours while you still can.


1. White Base- 8-1/2" x 5-1/2". Score at 4-1/4


2. White 5-1/4" x 4" Embossed glued to card front. Ink blend blue ink in embossed piece.


3. DSP Glued to card front.


Bottom strip- 4" x 1/2"


Middle strip- 4" x 1"


Top vertical strip- 1" x 4" (Glue this piece 1st)


4. Die-cut leaves, and add to card front.


5. Stamp, mask, and die-cut flower. Add to card with Dimentionals.


6. Add bow, and gems.


  • Facebook
  • Pinterest
  • Instagram

© 2020 by Stampin with Kimberly   |   Proudly created with Wix.com

bottom of page